Ok, so you don’t have to own a BlackBerry to enjoy “Push” email: Email that is actively transferred (pushed) to the device as it arrives. It doesn’t even have to be a Smartphone.
The reason why I selected a Sony Ericsson K800i is because… I still use it! 😉 Though I use a SE K800i here to demonstrate the settings, I’m pretty sure you can use the same settings with any phone that supports IMAP to send and receive Gmail messages.
Off to the steps…
Enable IMAP access in Gmail
If you haven’t already done so, you have to enable IMAP access in Gmail, so that you can use the mail client in your mobile device to access your email.
1. Go to “Settings” in Gmail and select the “Forwarding and POP/IMAP” tab:

2. In the “IMAP Access” section, select the “Enable IMAP” under “Status”.

Remember to save your changes
Set up the mobile phone’s mail client
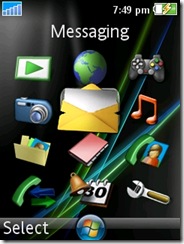
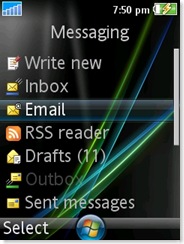
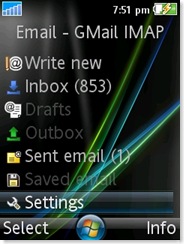
1. From standby, select “Menu” => “Messaging” => “Email” => “Settings”.
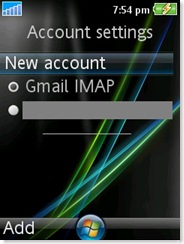
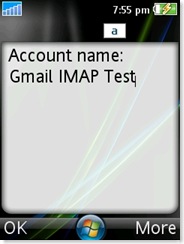
2. Select “New Account” and type a name for your account (e.g.: “My Gmail Account”).
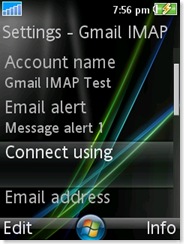
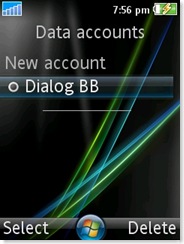
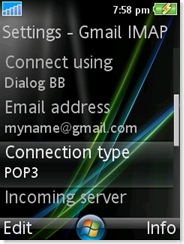
3. When you press “Ok”, you will be taken to the first set of settings. Select “Connect Using” and select a data account you have set up in the phone (If you don’t have one, you will have to set up a data account with your mobile operator first. Without a data connection, you won’t be able to continue).
4. Once the data account is selected you will be back to the settings. Now select the next item, “Email Address” and enter your full Gmail address (including “@gmail.com”). Press Ok.
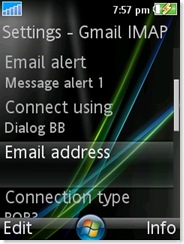
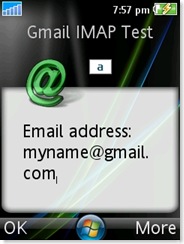
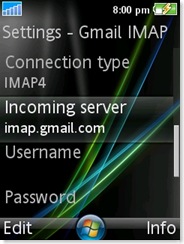
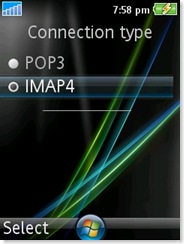
5. Next step is to select “Connection Type”. Select IMAP4 as the connection type.
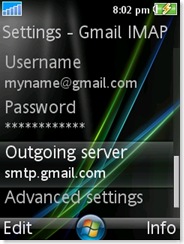
6. Then change the “Incoming Server” option’s value to imap.gmail.com. Username should be your full email address and set your Gmail password.
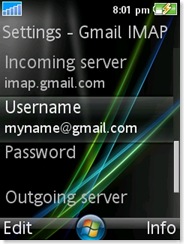
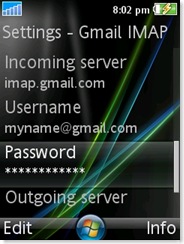
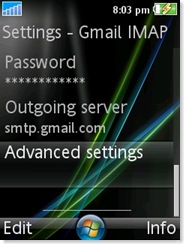
7. Change the “Outgoing server” option’s value to smtp.gmail.com, and move on to the “Advanced Settings” option.
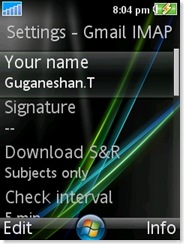
8. Under Advanced Settings, you can set your name (how you want it to appear in mails) and a signature. Under “Download S&R”, I recommend you select “Subjects Only” so that you can check the subject and decide whether to press the button on the mail to download it or not.
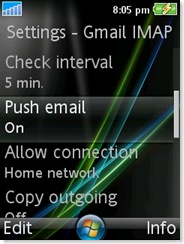
“Check Interval” can be used if you don’t want to use Push email. Setting a check interval won’t keep the phone connected always. Instead it will check for mail periodically when the check interval elapses (This is recommended if your phone has battery life problems!).
Turn “Push email” on if you want to be notified about incoming email as it arrives (like in a BlackBerry!). This option will not be available at this time. But it will be available AFTER you create the account. The only warning I would give is that it will drain your battery fast. So if it is a problem, leave it off and use the “Check Interval” option to an appropriate value.
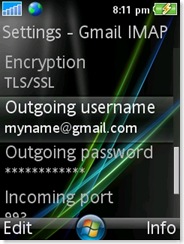
9. Now select the “Encryption” option. You will find two sub options in it. Select SSL for “Incoming Server” option and select “TLS” for the “Outgoing Server” option. Use the back button on the phone to come out of the “Encryption” settings.
Select the “Outgoing Username” next and enter you full email address (including “@gmail.com”). And enter you Gmail password for “Outgoing Password”.
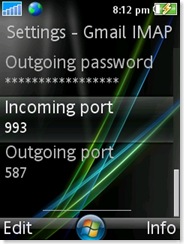
Set the “Incoming port” to 993 and “Outgoing port” to 587. That is the last option under the “Advanced settings” section. Now press the back button to come to the previous settings screen. Press the back button again to come out of the email settings altogether.
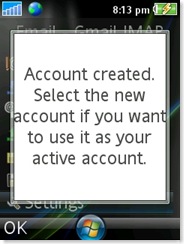
You should get a popup saying: “Account created. Select the new account if you want to use it as your active account.”
(Note: Hope you remember, I said that the “Push” email option wouldn’t be available until the account is created. Now, either you should get another popup sooner or later saying that Push access can be enabled asking whether to enable it, or you can go into the settings again and turn it on).
To go back to edit any settings you should follow:
Messaging => Email => Settings => (now highlight the account) => More => Edit Account.
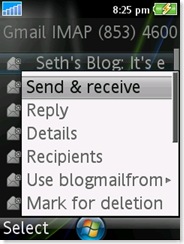
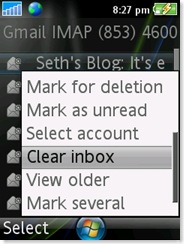
10. To send and receive email, come into the email inbox => More => Send & Receive. You can mark mails for deletion. To clear the emails that were “marked for deletion”, you should select “Clear Inbox”.
That’s all folks.. enjoy Gmail through IMAP4, using an old brick. ![]()
Hope that helps at least another Sony Ericsson K800i user!
Further Reading:
32 replies on “Gmail with Push e-mail in a Sony Ericsson K800i – using IMAP4”
yeah thanks. It works like charm
Good to know it helped!
Hello there, just doing some browsing for my Sony website. Truly more information than you can imagine on the web. Wasn’t exactly what I was looking for, but great site. Cya later.
Thanks for stopping by for a comment Suzanne. You got a good site too!
Thank you Brother
thank you for your tutorial Mr. Guganeshan, Namaste
Tarun & Aditya, you are welcome!
Works great on my W890i – thank you!
thanks for the info.it worked but i cant seem to to turn on the push email thing.its inactive.what do i do.my phone is k800i.thanks
Hi Karisa,
After reading your comment, I created a new account in the K800i just to confirm. As I have mentioned, the option does not turn on immediately.
Try these stepes:
1. Make sure the email account is selected.
2. Go in to the Inbox and press “Send & Receive” (left button)
3. If all settings are correct it will fetch mails (if any). Press Ok in the following popup alert.
4. Now you will get a popup asking whether to turn on Push Email, and you can select “Yes”.
It is working properly in my K810i, well done Mr. Guganeshan.T.
Hi..
I am using SE Naite..I have Imap4 as well as SMTP to configure in-order to activate push mail. Can u help me with complete settings?
Thank You Very Much !
Hi Arus,
I checked on the web and it seems many owners of the Naite (J105) have problems with Gmail (at least to receive mail).
I haven’t seen the phone, so I cannot list you the exact steps.
If nothing else works for you, there’s a java application by Google that you can use. It will work if your Internet connection is working.
Visit: m.google.com/mail
using your mobile phone browser to install it.
Hope this helps.
I tired until i find your settings!!
Thank you, very much!!
Great… thanks for letting me know about it in a comment! 🙂
I use SE Cedar. My push email is configured and turned on, but not always-connected. After (somewhat) 2 mins, the connection closes and there is no more email notifications, because the phone is not connected to the server. Where is the problem?
Hi Velizar,
First of all, sorry for the late reply.
I have never come across such a problem, so I can’t give an answer to that right away.
But just to make sure everything is right…
Please double check whether the “Push email” feature is on by going back to the email settings after you have configured it. You can also try to “Check Interval” around 5 minutes, without push email, just to see whether it would work continuously
Did it show you notifications for incoming mail at least once? Will be happy to know what happened to your problem
I followed your istruction carefully
at the end when I tried vto send the message I faced this messege:
server not found
It is very important for me to email through mobile
Thank you any way
Esfandiar Khodaee a freind from Iran
Hi Esfandiar,
“Server not found” simply means that the mobile couldn’t reach Gmail’s servers.
This could be because of several reasons:
First, please double check to make sure the outgoing server address is correct – smtp.gmail.com, and then outgoing port – 587 according to the steps I have listed.
If that is correct, and if you still cannot connect, please double check your internet connection. Can you browse websites?
Thanks, Guganeshan! I fourth-checked that push email is ON. I found the correct problem. The connection can be alive more than 1000 hours. But when I receive mail, it delivers and the connection.. closes…….
hi Guganeshan ,
thanx for your help but i still have ” unknown server ” error i don’t know what’s wrong
NB: i have a hotmail acount
thank u
Hi Sarah,
As far as I have read, Hotmail doesn’t support IMAP. I thought the new Outlook.com accounts will support it too. But it seems they will add IMAP support only later.
So you have 2 paths to go:
1. Switch to an email provider who offers IMAP (like GMail) OR
2. Upgrade to an Outlook.com account and wait until they provide IMAP. (Upgrading to Outlook is simple, you just have to login with your hotmail username and password and it will work)
Hope this helps. Let me know if you have any concerns.
It worked very well on SE T700!
Thanks very much for your time and very well explained and illustrated instructions 🙂
Sorry for the delayed reply… you are welcome 🙂
hello Guganeshan you are perfect, you are too much infact I love you, I can now receive and send email thank you very much mr. Guganeshan may God bless you.
Hi Seth,
I’m very happy to help, God bless you too 🙂
Hi
Just wondering if you can set up multiple email accounts on the sony erricson w800i?
Thanks
Billy
I thaaank You !!!!
It works perfect !!!!
imam k800i i sve uradim kako ste naveli i telefon mi neuspostavlja vezu sa serverom?
Sorry Sabo, I no longer use that phone, so I’m unable to help
posaljite mi mailom podesavanja
I want setting on sony w810